How to lay laminate flooring
So, you’ve just bought some gorgeous laminate flooring to transform your room. All that needs to happen now is the fitting. We recommend leaving it to the experts and having a professional fitter do this.
However, if you feel up to the challenge and want to fit it yourself, we’re here to offer our expertise to help you out…
The stages of fitting laminate flooring
Before getting stuck into your new home renovation project, it’s important to have everything you need. This easy-to-follow guide will take you through each step of installing laminate flooring in your home, which includes:
- Step 1: Tools you'll need for fitting laminate flooring
- Step 2: How to measure a room for laminate
- Step 3: Important safety advice
- Step 4:How to prepare your laminate floor
- Step 5: The importance of underlay & how to fit it
- Step 6: How to install laminate flooring
- Step 7: How to get the perfect laminate finish
- Carpetright's fitting arrangement service
- Laminate aftercare and inspiration
Step 1: Tools you'll need for fitting laminate flooring
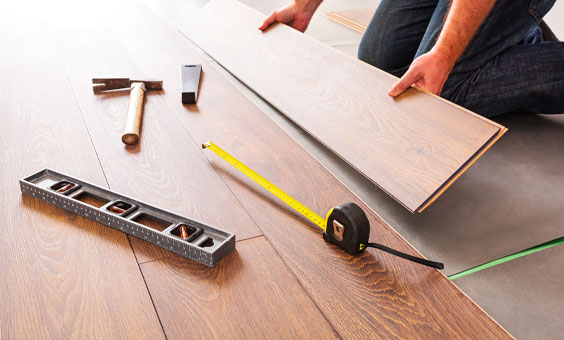
Before you start your installation process, you’ll need to make sure you have the right tools to get the job done right. Many of the tools you may already have in your toolbox and most DIY outlets sell a flooring kit that will include the pull bar and spacers for the job.
Tools you might need include:
• Mitre saw
• Small crowbar
• Hammer
• Square
• Drill with flat wood bit
• Flooring kit (including spacers and pull bar)
• Stanley knife
• Tape measure
• Pencil
• Safety goggles and face mask
• Masking tape
• Vacuum cleaner
Step 2: How to measure a room for laminate
If your room is perfectly square or rectangular, the area can be calculated by multiplying the width by the height. For example, a room that is 5m x 2m will need 10m2 of laminate flooring.
- If your room includes recesses or chimney breasts, it helps to draw a diagram of the room complete with any alcoves, fireplaces, nooks and crannies.
- Measure each individual area and write the measurement in the relevant space on the diagram.
- Break the room down into smaller rectangles that you can add together to get the total area of the room. Then add an all-important 5% for waste.
- Measure your lengths more than once to make sure they’re right.
- Remember to measure to the back of any door frames or room trims that you want the laminate to go under when it is fitted.
- When it comes to stairs or steps, the process is similar. Measure the height and depth and of each stair to give you then length before multiplying by the width. This will give you the area of each step. Again, don’t forget to allow 10% for waste and to allow for any margin of error as staircases can be tricky.
- Laminate flooring is usually sold in packs that are labelled by their size in metres squared. For example, for your 10m² room, you’d need 2 packs of 5m² laminate.
- Watch our step-by-step video guides to measuring different room shapes from a simple room to a room with a join or extra space.
How to measure a simple room accurately
Watch our step-by-step guide to accurately measuring a simple room. This shows you what equipment you need and how to calculate the correct area. It's never been easier to get a perfect fit.
How to measure a room with extra areas
Learn the basic steps to accurately measure a room with extra areas and understand how much carpet you'll need by watching our helpful video.
How to measure a room which needs a join
If your room is wider than the 4m or 5m widths that carpets come in, then you'll need to join two rolls together. Learn how to accurately measure a room that requires a join with our step-by-step guide.
Step 3: Important safety advice
Your safety is always the most important thing when fitting a floor. If you’re unsure about anything, get professional advice.
Before getting started with fitting your laminate flooring, follow these safety tips for your own peace of mind.
- Always wear safety goggles and a face mask when cutting wood.
- Wear kneepads to protect your knees and try not to stay on your knees for long periods. Take regular breaks to avoid being injured.
- Measuring a room and fitting new flooring is always easier when you have a second pair of hands. A measuring buddy will ensure you get accurate measurements, which will mean you get the best price and fit.
- Be extra careful when using solvents and fillers. They can be flammable and toxic. Keep them out of reach of children at all times.
Step 4:How to prepare your laminate floor
Before you can even think about laying your first laminate flooring plank, you need to prepare your sub-floor. If this isn’t done right, your finish and fit of your new laminate floor won’t be right. You don’t want to get this far only to have things be less than perfect.
Here are the steps you need to follow to make sure you get your sub-floor right:
- Make sure the entire area is smooth, even and dry. If it is a newly concreted floor, make sure it is fully dried out. Fix any screws and nails firmly below the surface, so that they don’t puncture the underlay or laminate.
- Make sure all your packs of laminate boards have been resting horizontally in the area they are to be fitted for 48 hours so they are flat and have acclimatised to the room.
- Clean up any dust and debris with a vacuum cleaner and scrape or sand off any existing adhesives from previous flooring.
- If laying on concrete, you will need to put down a damp-proof membrane. We’d recommend using an underlay with a built-in damp-proof membrane to make this step easier.
Step 5: The importance of underlay & how to fit it
Underlay is an integral ingredient in getting the best from your laminate flooring. It effects how your flooring looks and feels and can even affect its longevity.
Installing underlay is easy and will dramatically improve the look, feel and performance of your new floor. The right underlay will add comfort underfoot, absorb shock and noise and act as an insulator, meaning you could save money on your energy bills too. Not bad, eh?
There are lots of underlay types for laminate flooring, each with different advantages. For example, thicker options offer more sound proofing, which could be a consideration if you are laying a floor in an upstairs room or flat. When fitting your new laminate underlay consider the following:
- Remember to check that your chosen underlay is suitable for the area it’s going in. Specific types of underlay are needed for wet areas like the kitchen and bathroom.
- Lay the underlay over the entire floor and trim to fit, cutting a 16mm gap around any pipes. Lay lengths parallel and stick together with masking tape.
Unsure about what kind of underlay to fit under your laminate flooring? Why not read through our guide to buying underlay or pop into a local store for more expert advice?
Step 6: How to install laminate flooring
Before fitting laminate flooring, think about which direction you would like the board to lie in. Ideally, they will lay in the direction of the longest wall but if your subfloor is wooden, then it is best to have the laminate boards fitted across the joists underneath.
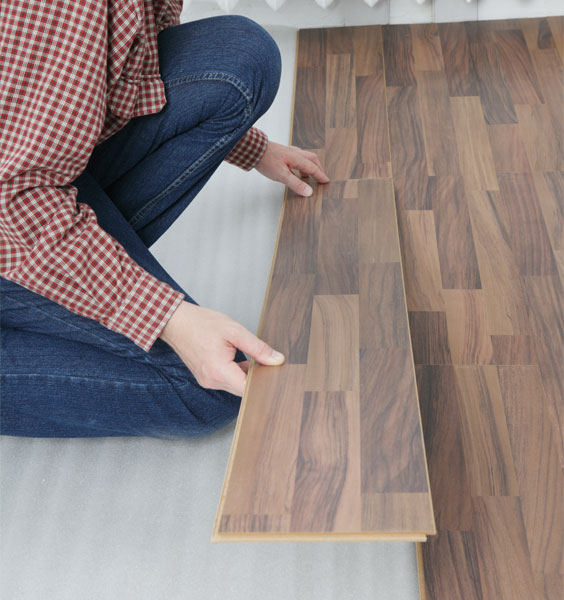
- Start in a corner and lay the first row of boards tongue side facing the nearest wall.
- The boards will click together using the click system.
- Place spacers from your flooring kit between the board and the wall with an 8-10mm expansion gap.
- NOTE: The last row of boards will need to be at least 100mm wide, so measure ahead and adjust your first row by cutting the boards if necessary.
- You will probably need to adjust the length of the last board in the row to make it fit the length of your room. Use the square to mark the back of a board so you know where to cut. You can use the off cut to start the next row if it is at least 300mm.
- Lay the rows side by side, ensuring the joints are staggered from row to row. Continue to use the spacers to maintain a consistent gap between the planks and the wall.
- Calculate the width of the last board by laying a plank over the previous row. Place a third plank with its tongue against the wall and mark a line on the plan beneath. This will give you the desired width. Then use the hammer and pull bar to fit it tightly into space.
- As laminate is a 'floating floor' it must not touch any wall, door frames or pipes to save the laminate moving or becoming damaged.
Step 7: How to get the perfect laminate finish
Placing laminate flooring around door frames
Fitting laminate flooring around door frames is the tricky bit, but it’s worth getting it right as it can make or break your final result. You basically have two choices – to either cut the boards around the shape of the door frame, or to undercut the door frame to slide the board under.
- If you are cutting the board around a door frame, lock it in place before making and cutting using the mitre saw.
- A simpler way to get a neat finish is to undercut the door frame with a handsaw. Measure the depth of your boards to make sure you don't cut too much off your door frames.
- It is unlikely that you will be able to lift the board to click it into the next board, so sand off the tongue and use a wood adhesive to keep it locked in place.
- You can cut holes for radiator pipes by drilling with a flat wood bit and then using the mitre saw to make a keyhole shape in the board to fit around the pipe. A hole of around 30mm is usually sufficient. Make sure the laminate board does not touch any of the radiator pipes.
Placing laminate floor edging
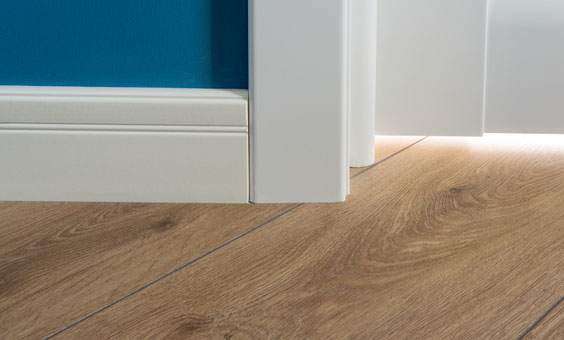
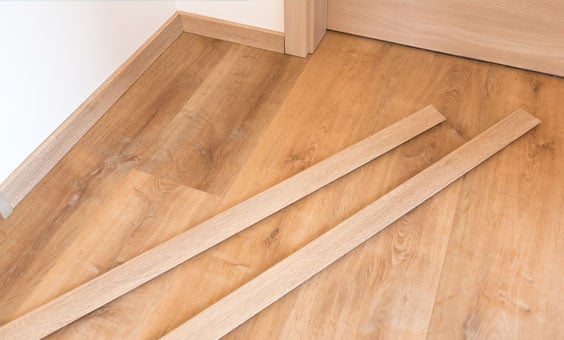
If you’ve decided not to remove or undercut the current skirting boards in the room you’re renovating, laminate floor beading is one of many great floor accessories for finishing the job. You can purchase a trim that matches the woodwork that’s been put down to leave a seamless finish to your room. Below are a few tips for placing floor beading:
- Measure the lengths required, cut 45 degree angles at the corners and apply a thin line of wood glue to the back of the trim. Do not apply to the bottom of the trim - the glue should stick to the skirting board, and not the floor.
- Hold the trim in place with some tacks or heavy objects such as books while the adhesive dries.
- If you are using a transitional trim to separate laminate from another type of flooring in another room, make sure you choose an option that is suitable for us on both surfaces.
Carpetright's fitting arrangement service
We’re proud to arrange a professional fitting service that’s approved, meaning the fitters have all passed a rigorous assessment process and demonstrated suitable skill and depth of knowledge.
Letting us arrange the fitting service for you means you get to enjoy your room transformation with much less hassle. Just select fitting at our online checkout, or ask one of our friendly advisors, if you’re buying in-store.
As well as a standard fitting service, fitters also offer an uplift and disposal service. For a small fee, the fitters will not only fit your new floor, they will also get rid of the old one too.
It’s just one less thing for you to worry about.
Find out what you can expect from our professional fitting arrangement service by clicking here.
