How to lay wood flooring
At Carpetright we would always advise that you use a professional floor fitter to ensure you get the best possible finish. However, lots of people prefer to do it themselves and if you are one of them, we’re on hand to help!
Still unsure which engineered wood flooring to go for? Check out our Wood Flooring Buying Guide to find your perfect match, or try our visualiser tool.
Carpetright's fitting arrangement service

We’re proud to arrange a professional fitting service that’s approved, meaning the fitters have all passed a rigorous assessment process and demonstrated suitable skill and depth of knowledge.
Letting us arrange the fitting service for you means you get to enjoy your room transformation with much less hassle. Just select fitting at our online checkout, or ask one of our friendly advisors, if you’re buying in-store.
As well as a standard fitting service, fitters also offer an uplift and disposal service. For a small fee, the fitters will not only fit your new floor, they will also get rid of the old one too.
It’s just one less thing for you to worry about.
Find out what you can expect from our professional fitting arrangement service by clicking here.
The stages of fitting wood flooring
Before getting stuck into your new home renovation project, it’s important to have everything you need. This easy-to-follow guide will take you through each step on installing wood flooring in your home, which includes:
- Carpetright's fitting arrangement service
- How to measure a room for new flooring
- Wood flooring tools
- Removing old flooring and preparing your sub-floor
- How to lay underlay for wood flooring
- How to lay wood flooring
- Laying wood flooring around door frames
- Wood flooring edging
- Wood flooring aftercare and inspiration
How to measure a room for new flooring
If your room is perfectly square or rectangular, the area can be calculated by multiplying the width by the length. For example, a room that is 5m x 2m will need 10m2 of flooring.
For rooms that include recesses or chimney breasts, draw a diagram of the room, including any alcoves, fireplaces, nooks and crannies. Measure each individual area and keep note of the dimensions on a sheet of paper. Then, break the room down into smaller rectangles that you can add together to get the total area of the room. Remember to include an all-important 5% for waste.
Measure your lengths more than once and remember to measure to the back of any door frames or room trims that you want the flooring to go under when it is fitted.
Measuring stairs or steps is quite simple. To give you the length, measure the height and depth of each stair before multiplying by the width. This will give you the area of each step. Again, to allow for any margin of error, add 10% for waste.
When you buy engineered wood flooring, bear in mind it is usually sold in packs that are labelled by the size in meters squared. For example, one pack might include 5m2 of flooring.
How to measure a simple room accurately
Watch our step-by-step guide to accurately measuring a simple room. This shows you what equipment you need and how to calculate the correct area. It's never been easier to get a perfect fit.
How to measure a room with extra areas
Learn the basic steps to accurately measure a room with extra areas and understand how much carpet you'll need by watching our helpful video.
How to measure a room which needs a join
If your room is wider than the 4m or 5m widths that carpets come in, then you'll need to join two rolls together. Learn how to accurately measure a room that requires a join with our step-by-step guide.
Wood flooring tools
Tools you might need include:
- Tri-square
- Pencil
- Ruler
- Workbench to secure the boards when cutting
- Clamp to secure the boards to the workbench when cutting
- Panel saw for small projects, cutting a few boards and cutting boards to fit around door frames
- Jigsaw for making fiddly cuts and cutting holes for radiator pipes. Use with a hardwood blade for the best results. We advise having several spares to hand, as your cuts will get rougher as the blade wears away
- Mitre saw for larger projects or lots of cutting, if necessary
- Power drill to cut holes for radiator pipes, if necessary
- 32mm flat wood drill bit or 30mm hole saw to cut holes for radiator pipes, if necessary. Standard radiator pipes are 15mm in diameter, so these will create a hole big enough for the pipe and the expansion gap
- Wood chisel to fit boards around door frames
- Wooden mallet to fit boards around door frames
- Plane to shorten the length of the door, if necessary
- Hacksaw to fit the threshold bar
- Screwdriver to secure the threshold bar, dependent on installation
- Cartridge gun to apply the grab adhesive to the flooring trim, if necessary
- Ball-Pein hammer to secure the panel pins to the flooring trim, if necessary
- Scotia to cut floor trim
Removing old flooring and preparing your sub-floor
Removing your old floor
Before fitting your new floor, it’s likely that you will need to remove your old one alongside preparing the sub-floor underneath. At Carpetright we make fitting a new floor easy at every step. Alongside our professional approved fitting arrangement service, we also offer uplift and disposal. We can arrange the uplift of your old flooring and dispose of it for you to ensure that you experience a hassle-free fit.
Learn more about the uplift and disposal service here.
Preparing your sub-floor
- Make sure the entire area is smooth, even and dry. If it’s a newly concreted floor, make sure it is fully dried out. Fix any screws and nails firmly below the surface, so that they do not puncture the underlay or wood.
- Make sure all your packs of boards have been resting horizontally in the area they are to be fitted in for 48 hours. This is so they are flat and have acclimatised to the room.
- Clean up any dust and debris with a vacuum cleaner and scrape or sand off any existing adhesives from previous flooring.
- If laying on concrete, you will need to put down a damp-proof membrane. We recommend using underlay with a built-in damp proof membrane.
- Remove skirting boards so that they can be re-fitted when the new boards are in, if you do not plan to use any beading.
How to lay underlay for wood flooring
Bear in mind that not all types are suitable for wet areas such as kitchens and bathrooms, while some types come with a built-in damp-proof membrane.
- Place the underlay at one end of the room and unroll from the wall.
- Lay lengths parallel using scissors or a knife to trim and stick together with masking tape.
- Continue in this way across the room. Although we need the edges to meet, it’s important to ensure they don't overlap as this will create an uneven floor.
- Leave a gap of 10mm around pipes.
Check out our underlay buying guide for more information on the different types of underlay!
How to lay wood flooring
Before fitting engineered wood flooring, think about which direction you would like the boards to lie in. Ideally, they will lay in the direction of the longest wall, but if your subfloor is wooden, then it is best to have the boards fitted across the joists underneath.
- Working from left to right, start in a corner and lay the first row of boards with the end of the groove facing the nearest wall.
- Place expansion spacers between the board and the wall with an 8-10mm expansion gap. This gap will cater for the natural shift in size through seasonal and temperature changes, and without it your flooring could become damaged.
- NOTE: The last row of boards will need to be at least 100mm wide, so measure ahead and adjust your first row by cutting the boards if necessary.
- The boards will click together using the click system.
- Lay the next board, fitting the tongues together at 30 degrees from the floor, before lowering it to a level and locking it in place. Carry on until the end of the row.
- The last board of the row will need to be cut to size if it is too long to fit. To accurately measure the board to the exact size of the gap, turn it 180 degrees and lay it next to the previous board (remember to use an expansion spacer). Draw a line across the board, using a tri-square and pencil, level to where it meets the previous board. Now, cut the board to size and fit in the end of the row with the freshly cut side facing the wall.
- You can use the off-cut to start the next row, if it is at least 300mm. However, if it's too short, simply cut a board in half and use that.
- Lay the rows side by side, ensuring the joints are staggered from row to row. Continue to use the spacers to maintain a consistent gap between the planks and the wall.
- Calculate the width of the last board by laying a plank over the previous row. Place a third plank with its tongue against the wall and mark a line on the plan beneath. This will give you the desired width. Then use the hammer and pull bar to fit it tightly into space.
- As engineered wood is a ‘floating floor’ it must not touch any wall, door frames or pipes to stop the flooring from moving.
Laying wood flooring around door frames
Fitting wood flooring around doorframes can be tricky, but it’s worth it for the finish achieved.
- Before you start, make sure that the door will open with the new flooring and door bar in situ. If it doesn’t fit, remove the door and either cut or plane a strip off of the bottom of the door.
- If the architrave extends beyond the skirting, trim the architrave to allow space for the underlay and flooring beneath it. This will give you a far neater finish.
- Lay an upside down board on a piece of underlay beside the door frame.
- Cut through the bottom of the architrave by placing a panel saw flat on the board.
- Remove the waste piece of wood using a wood chisel and wooden mallet.
- Make sure you allow for that all-important expansion gap at the wall beneath the architrave.
Wood flooring edging
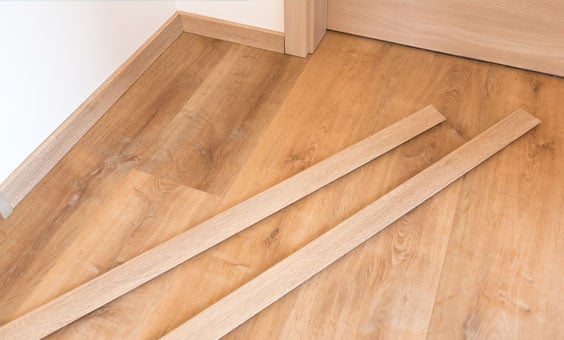
If you have chosen not to remove or undercut skirting boards, then using engineered wood floor beading is a clever way to finish off your project. These are very effective in blending your new floor with your existing woodwork if you chose a trim that matches.
There are matching flooring accessories available to ensure your floor looks seamless.
Measure the lengths required, cut 45-degree angles at the corners and apply a thin line of wood glue to the back of the trim. Do not apply to the bottom of the trim – the glue should stick to the skirting board, and not the floor.
Hold the trim in place with some tacks or heavy objects such as books while the adhesive dries.
If you are using a transitional trim to separate engineered wood from another type of flooring in another room, make sure you choose an option that is suitable for use on both surfaces.


